Map © Cyowari
Strategic Background of the Campaign
The year AD 530 marked a significant success for the Eastern Roman Empire. Despite being outnumbered, Roman forces achieved two decisive victories against the armies of their greatest eastern adversary, the Sasanian Empire. These triumphs provided ample justification for concluding the war, and Emperor Justinian sought to capitalize on the favorable situation. Rather than pressing further militarily, he directed his efforts toward diplomacy, sending peace offers to the Sasanian king, Kavadh. Justinian even proposed a one-time monetary payment to facilitate an agreement. However, Kavadh faced internal political pressures that complicated the prospects of peace. Accepting a settlement after two humiliating defeats would have jeopardized the stability of Khosrow’s succession, Kavadh’s chosen heir. Additionally, the Romans had failed to exploit their battlefield successes fully, allowing the Sasanians time to regroup. It is plausible, and perhaps even likely, that Kavadh had planned this strategy from the outset. By initiating peace negotiations, he effectively bought time to reorganize his forces and strengthen his position. Kavadh also sought to improve his leverage in future negotiations by resuming the offensive. The defection of Armenian fortresses and noblemen to the Romans had exposed the precarious state of the Sasanian position, and Kavadh recognized the necessity of securing victories to stabilize his rule and bolster his negotiating stance.
The recent defeats demonstrated to the Sasanians that the Romans now maintained sufficient forces in Mesopotamia and Armenia to effectively defend their newly fortified cities. In response, Kavadh sought an alternative strategy and eagerly embraced the counsel of the Lakhmid phylarch, Al-Mundhir. Utilizing Lakhmid expertise, a mixed Sasanian-Arab force of approximately fifteen thousand cavalry, led by the spahbad Azarethes, advanced through Euphratesia and Syria. Along their route, the force systematically targeted and devastated vulnerable settlements and lightly defended areas.
Sasanian Preparations and the Invasion of Syria
The unexpected direction of the Persian attack caught the Romans off guard, but the resourceful Belisarius responded swiftly, moving south to confront the enemy. He left the bulk of his army stationed at Dara and other fortified cities in Mesopotamia, suspecting that the attack might be a diversion, and took with him only 3,000 horsemen and 5,000 Ghassanid Arab allies to ensure rapid movement. This precaution proved effective, as the Persians, led by a member of the Mihran family, besieged Dara after Belisarius had departed but were unsuccessful. In these circumstances, Belisarius’s primary objective was to prevent the Persians from causing significant damage and to drive them out of Roman territory without taking unnecessary risks. This cautious and measured approach would become a hallmark of his military strategy. With this in mind, Belisarius instructed his commanders not to engage the Persians until he had fully assembled his forces.
Belisarius and the Roman Response
After making contact with the Persian forces, who were pillaging the surrounding countryside, Belisarius established his camp at Chalcis, while the Persians were stationed near Gabbula. However, ignoring Belisarius’s direct orders not to engage the Persians, the dux Sunicas took matters into his own hands, leading 4,000 men in a surprise attack that successfully routed the Persians from their fortified camp. While this disobedience achieved remarkable results, it is unclear whether Belisarius was more displeased by Sunicas’s defiance or his success. The ensuing dispute between the two officers escalated to the point that it required the intervention of Magister Officiorum Hermogenes, who had the authority to enforce cooperation between them. Hermogenes arrived at Hierapolis with reinforcements and proceeded south to Barbalissus, where the Roman forces assembled. His arrival marked the point at which the Roman army was finally consolidated. Despite his efforts to mediate, reconciling Belisarius with his subordinate commanders proved to be a challenging task. Strategically, however, Belisarius and Hermogenes were in agreement. Their primary objective was to compel the Persians to withdraw from Roman territory without engaging in major battles. Belisarius understood the limitations of his force, which, while numbering over 20,000 infantry and cavalry, was not ideally suited to confront the well-organized Persian army. He regarded certain contingents, such as the Lycaonian infantry, as inferior in quality. Furthermore, if Procopius’s criticisms of the Arabs reflected Belisarius’s own views, it is likely that the general had little confidence in the combat effectiveness of his Arab allies. Local commanders, however, held a different perspective, likely influenced by recent events. In 529, prisoners taken by the Lakhmid leader Mundhir had been ransomed for a significant sum, while others had been killed during their captivity. These experiences may have fueled their eagerness to engage the enemy more aggressively.
Confronted with a numerically superior enemy, the Persian commander Azarethes began a strategic withdrawal toward the Persian frontier. Belisarius pursued cautiously, maintaining a distance of roughly one day’s march. Along the way, his troops often utilized the abandoned Persian camps from the previous day as temporary accommodations. The pursuit culminated near Callinicum, where Belisarius finally caught up with the Persian army on the eve of Easter Sunday in 531.
The Roman forces adhered to Belisarius’s cautious strategy until the retreating Persians reached Callinicum. At this point, Callinicum presented the final opportunity for the Romans to confront the enemy, and the officers and soldiers, emboldened by their recent victories, were eager for battle. Despite their best efforts to dissuade the troops, both Belisarius and Hermogenes were ultimately compelled to lead the men into combat to avoid the risk of mutiny. This situation further reinforced the commanders’ cautious approach. By this stage, the Roman soldiers were physically exhausted from their prolonged march, and the rigors of Easter fasting exacerbated their fatigue. Compounding these challenges, a portion of the Roman infantry had not yet arrived at the battlefield and remained en route. The soldiers and officers, however, advanced a compelling argument: Roman military doctrine emphasized the importance of engaging a retreating enemy force when it was weakened and nearing the frontier. Given this expectation, it is unsurprising that Belisarius and Hermogenes were unable to dissuade their troops from pressing for battle.
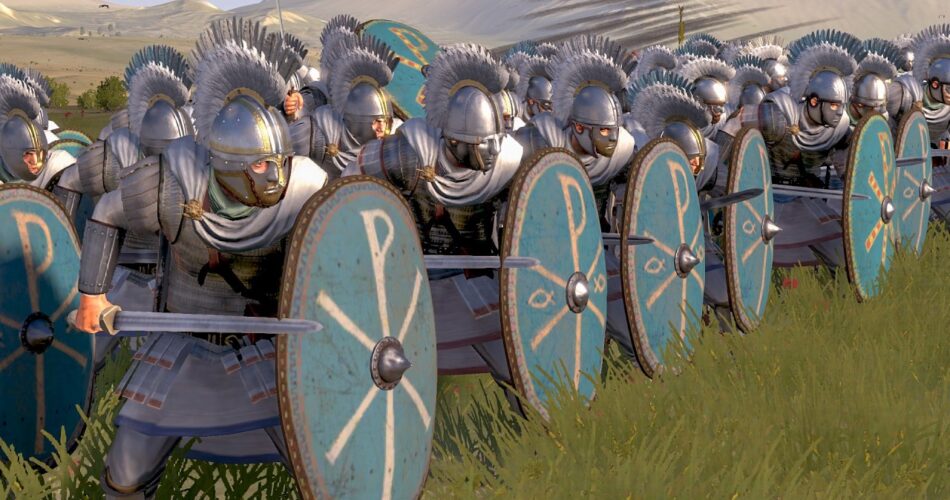
The Byzantine Battle Formation
Belisarius adopted a single-line formation at Callinicum to match the length of the Persian battle line. This arrangement, known in Roman military terminology as the “mixed formation,” was specifically designed for engagements against cavalry-heavy forces. On the left flank, regular infantry commanded by Peter were positioned near the Euphrates River on slightly elevated terrain. In the center, Belisarius himself took command of the heavy cavalry, forming the core of the Roman line. While the precise position of Sunicas and Simmas, commanding the Huns and light cavalry of the Byzantine army, remains uncertain, it is most likely they were stationed on Belisarius’s right wing. To their right, a Byzantine cavalry force under Ascan, comprising formidable cataphracts, occupied a position similar to that which they had held at the Battle of Dara. Further to the right, the Lycaonian infantry recruits, commanded by Longinus and Stephanacius, were positioned in the rougher terrain, where their abilities were believed to be better suited. On the far-right flank, the 5,000 Ghassanids, led by their phylarch Al-Harith, guarded the extreme edge of the line. While the Roman order of battle at Callinicum is less well-documented than at Dara, it seems that Belisarius employed a strategy contrasting with that of the previous year. At Dara, he had avoided engaging in the center and instead concentrated his strength on the flanks. At Callinicum, however, he placed his strongest forces—the heavy cavalry—in the center, while the infantry was stationed on the wings. This arrangement may reflect his anticipation that the infantry could break under pressure or that the Ghassanids might abandon their positions. Nevertheless, Belisarius likely hoped this formation would allow him to preserve the cohesion and effectiveness of his main force.
The Sasanian Deployment
When the Persians observed the Roman formation, they arranged their army accordingly. On their right flank were the Persian forces under Azarethes, while the Lakhmid allies under Al-Mundhir occupied the left. This situation was advantageous for the Persians, as the Romans’ adoption of the mixed battle formation left the initiative in the hands of the enemy. The Roman formation was inherently defensive, limiting the ability of their cavalry to advance far beyond the infantry without risking the cohesion of the entire line. Taking advantage of this static Roman arrangement, the Persians were able to harass their opponents with continuous volleys of arrows. It is likely that the Persian army was organized into two rotating lines, allowing them to maintain a steady barrage of missile fire while giving their archers time to rest and rearm. This tactic exploited the vulnerabilities of the Roman position, forcing them to endure sustained attacks without an effective means of retaliation.
The Opening Exchange of Missiles
The battle commenced with the customary exchange of missiles. The Romans, equipped with stiffer bows were capable of firing more powerful shots. Additionally, their use of foot archers enhanced the potency of their volleys. However, this advantage was offset by the Persians’ faster rate of fire and a favorable westerly wind, which increased the range and force of their arrows. Procopius noted that many Persian arrows were rendered ineffective by the superior Byzantine armor, while the fewer Roman arrows exhibited greater penetrative power. Despite this, the archery duel appeared evenly matched on the surface. In reality, however, the Romans suffered significantly. The strong westerly wind amplified the effectiveness of the Persians’ already more numerous volleys, tilting the balance in their favor. The ultimate result of this exchange remains inconclusive, but it is evident that the Roman forces were severely disadvantaged. By this point in the engagement, the Romans were likely exhausted from a combination of fasting, extended marches, and sustained combat. Their fatigue was further exacerbated by the lack of a proper midday meal, leaving them in a weakened state as the battle progressed.
The Persians’ next tactic involved attempting to provoke Sunicas and Simmas into breaking formation by executing a feigned attack. However, this maneuver failed to achieve the desired result, as the two commanders did not take the bait and maintained their positions within the formation.
The Collapse of the Roman Right Wing
Azarethes then redeployed a significant portion of his elite cavalry to the left wing, positioning them alongside the Lakhmids. This maneuver would prove critical. At the Battle of Dara, a similar tactic had been detected by the Byzantines, who had successfully countered it. However, on this occasion, the movement went unnoticed, and the subsequent attack was decisive. Without reinforcement, the Byzantine right wing collapsed under the onslaught. The combined forces of the Sassanid and Lakhmid cavalry struck the Byzantine right flank with such speed and intensity that the Ghassanid contingent immediately melted away, leaving the Lycaonian infantry and Ascan’s cavalry to defend the position alone. This allowed the Persians to secure control of the higher ground, further consolidating their tactical advantage.
This allowed the Persians to launch an attack on the rear of the Roman formation. Byzantine commander Ascan led his cataphracts in an effort to halt the Persian advance, resulting in heavy fighting on the Roman right flank. Together with the Lycaonian infantry, Ascan’s cavalry managed to momentarily stem the Persian offensive. However, both Lycaonian leaders, Longinus and Stephanacius, were killed, and Ascan’s cavalry soon found themselves surrounded on three sides. According to Procopius, Ascan put up a strong resistance, fighting until he and 800 of his men fell. His death severely undermined the morale of the inexperienced Lycaonian troops, who had been among the most vocal critics of Belisarius. Some of the Lycaonian soldiers offered only token resistance and were swiftly cut down, while others fled northward, attempting to escape by crossing the Euphrates. This retreat further disrupted the already vulnerable Roman position. As the pressure mounted, the remaining Byzantine cavalry fled, leaving only the infantry to face the advancing Persians.
The account of Malalas, however, offers a distinct interpretation, though it benefits from being based on the official report made after the battle. According to Malalas, the Ghassanids under Al-Harith fought valiantly, and the collapse of the right wing was actually triggered by the death of Ascan, who had charged into the heart of the Persian forces. His death led to the flight of the Lycaonian troops, which in turn caused the Ghassanids to retreat, except for those around Al-Harith. Malalas also mentions that some sources, including Belisarius, Procopius, and their allies, attributed the flight of the Arabs to the treachery of the phylarchs. Given the inherent friction of wartime accounts, it is difficult to determine which version is entirely accurate. However, it is possible to reconcile the differing accounts by proposing that the Arabs were already beginning to retreat when Ascan made his desperate charge in an attempt to halt their flight. His death, in this scenario, would have acted as the final catalyst, leading to the rout of both the Arabs and the Lycaonians, as suggested by Malalas.
The Last Stand of the Roman Infantry
The Persians pursued the fleeing Romans for a short distance before turning back to attack the infantry phalanx, which was composed of Belisarius’s dismounted cavalry and regular infantry. In response to the Persian assault from the south, the Roman army shifted its alignment by ninety degrees, positioning the Euphrates at their rear. At this point, where the battle came down to infantry engagement, the sources diverge. Procopius states that Belisarius retired to the infantry, dismounted, and fought alongside them until nightfall. In contrast, Malalas claims that Belisarius fled earlier in the battle, escaping by boat across the river. According to Malalas, it was Sunicas and Simmas who dismounted with their troops to fight alongside the infantry. Belisarius is widely recognized as a defensive commander, a characteristic that recurs throughout his campaigns. This defensive approach is evident in the way the Roman infantry fought at Callinicum. Their actions were deliberate and focused on holding their ground, aligning with Belisarius’s preference for disciplined, reactive tactics. In contrast, Sunicas was known for his aggressive command style, excelling in flanking maneuvers and surprise attacks, as seen in the Battle of Dara and the early stages of the Callinicum campaign. This more offensive approach, however, seems at odds with the defensive nature of the infantry engagement at Callinicum. While Sunicas likely played a key role in the cavalry maneuvers, the cautious strategy of the infantry does not align with his typical tactics. Given this, it seems reasonable to assume that Belisarius himself was more directly involved with the infantry at Callinicum. His ability to organize and lead a disciplined defensive effort likely influenced their performance. However, battlefields are complex, and command roles can overlap, suggesting that Sunicas may have adapted his tactics or contributed in ways not typically associated with his usual style. The absence of detailed records leaves room for alternative interpretations, making the true dynamics of the battle subject to ongoing debate.
The infantry adopted the fulcum formation, which later became the equivalent of the famous testudo, used to defend against heavy missile attacks. Procopius describes a formation that closely resembles the foulcum outlined in the Strategikon, characterized by a dense mass of soldiers where the shields of the front-rank interlock, while those of the second rank hold their shields above the heads of the front-line troops. Although Belisarius’s troops probably didn’t keep their lances to fight off the Persian cavalry, as suggested in the Strategikon, the archers behind the shield wall would still have been able to cause significant damage to the attackers. They arranged themselves in a “U” shape, with the river closing off the top. The discipline of the infantry remaining on the south bank is demonstrated by their steadfastness in the face of enemy charges. To counter the Persian cavalry, they employed the tactic of clashing their shields, a well-known method for frightening horses. The phalanx massed together to create a barricade of protruding spears. The tightness of the formation, the effective archery from foot soldiers, the clashing of shields, and the wall of spears were sufficient to disrupt the Persian cavalry’s frontal charge. With foot archers positioned in the center of the ‘U’ providing overhead supporting fire, the infantry was able to withstand the Persian assault. However, the Persians did not relent. They repeated their charges and attacked again and again until late in the day, when they finally withdrew in frustration after sustaining heavy casualties. The Persian retreat provided the Romans with an opportunity to fall back to a nearby island, from where they retreated to Callinicum the following day by freight boats.
Procopius deliberately avoids providing an overall estimate of Roman casualties, stating only that “the Persians did not find their own dead less numerous than the enemy’s,” likely in an attempt to downplay the extent of the Roman defeat. However, it is plausible that the Sassanids suffered relatively few casualties during the earlier stages of the battle. As the conflict progressed, the determined resistance of the Roman infantry and the repeated, unsuccessful cavalry charges by the Sassanids likely increased Persian losses. Despite this, the Battle of Callinicum concluded with a decisive defeat for Rome and Belisarius, negating the advantages gained from the earlier victory at Dara and shifting the strategic initiative back to the Persians.
Strategic Consequences and Aftermath
The strategic outcome of the battle was effectively a stalemate. The Byzantine army suffered significant losses and would not be fit for combat again for several months. However, the Persian army also endured heavy casualties, rendering it ineffective for its original objective of invading Syria. Following the battle, Azarethes continued his retreat, eventually reaching the Persian court. Kavadh, the Sassanian emperor, appeared unimpressed with his general’s victory. The campaign had yielded minimal gains, with Gabbula being the only notable capture, and casualties had been high. As a result, Kavadh removed Azarethes from command and stripped him of his honors. On the Roman side, an inquiry led by Constantoilus was conducted regarding Belisarius’s defeat at Callinicum, as well as his earlier loss at Thannuris. Belisarius blamed his troops for their eagerness to engage in battle at Callinicum, and he was ultimately cleared by the inquiry. However, he was relieved of his position as magister militum per Orientem and recalled to Constantinople by Emperor Justinian.
© 2026 History and War
Author: Jishu Roy
Unauthorized reproduction of this content is prohibited.