Historical Overview: The Siege of Ma‘arra and the Fracturing of the First Crusade
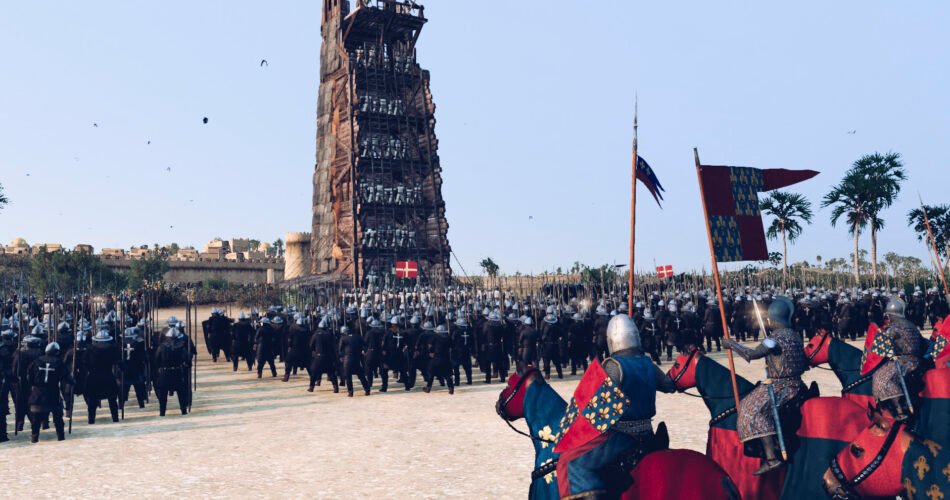
The Siege of Ma‘arra in late 1098 represents a critical turning point in the First Crusade, exposing the volatile intersection of territorial ambition, logistical desperation, and popular religious fervor. Occurring during the chaotic aftermath of the capture of Antioch, this campaign was far more than a minor military operation; it was the crucible in which the structural and moral cohesion of the entire expedition was tested. This article analyzes how the political deadlock between Bohemond of Taranto and Raymond IV of Toulouse fractured the Crusader host, forcing independent factions into the complex geopolitical landscape of northern Syria. By examining the tactical mechanics of the siege alongside the resulting humanitarian crisis—marked by famine-driven cannibalism and a brutal civilian sack—this study highlights the ultimate collapse of traditional military hierarchy. Ultimately, this article demonstrates how an extraordinary rank-and-file mutiny by impoverished pilgrims systematically dismantled the city’s fortifications, breaking the political stalemate of the princes and forcing the fractured leadership to resume the march toward Jerusalem.
The Power Struggle and Supply Crisis at Antioch
The Crusaders’ victory over Kerbogha at the Battle of Antioch on 28 June AD 1098 secured the city from immediate Muslim control, but it soon led to a serious dispute over who had the right to govern it. Two principal claimants emerged: Bohemond of Taranto and Raymond IV of Toulouse. An intense debate among the Crusader princes began in early July. Bohemond argued that the Byzantine Empire had failed to provide adequate support to the Crusaders during the siege and had therefore forfeited its claim to Antioch. His position was further strengthened when news arrived that the Byzantine army under Emperor Alexios had abandoned its advance and turned back from Philomelion. Raymond, however, maintained that the Crusaders remained bound by their oath to Alexios and that Antioch therefore belonged to the Byzantine emperor by right. Faced with these competing claims, the other princes were reluctant to take a definitive position, leaving the question of Antioch’s future unresolved.
The dispute between Bohemond and Raymond over the future of Antioch was part of a broader crisis facing the Crusade. With the princes having agreed to postpone their march toward Jerusalem until November they now had to determine how to keep their armies together during the four-month delay.
Until this point, the common objective of capturing Antioch had provided the expedition with a clear sense of purpose. With that goal achieved, however, there was a growing danger that the Crusader forces would fragment and lose their direction. The problem was made more serious by the difficulty of supplying the armies. Now that Antioch was under Crusader control, the surrounding territory could no longer be treated simply as enemy land from which provisions could be seized. At the same time, the Crusaders were exhausting the areas from which they had previously obtained supplies through raiding.
The princes therefore adopted a partial solution to the problem. Rather than keeping the entire army concentrated around Antioch, the different contingents would return to the foraging areas they had used during the earlier siege. This would distribute the burden of supplying the Crusader forces across a wider area of northern Syria.
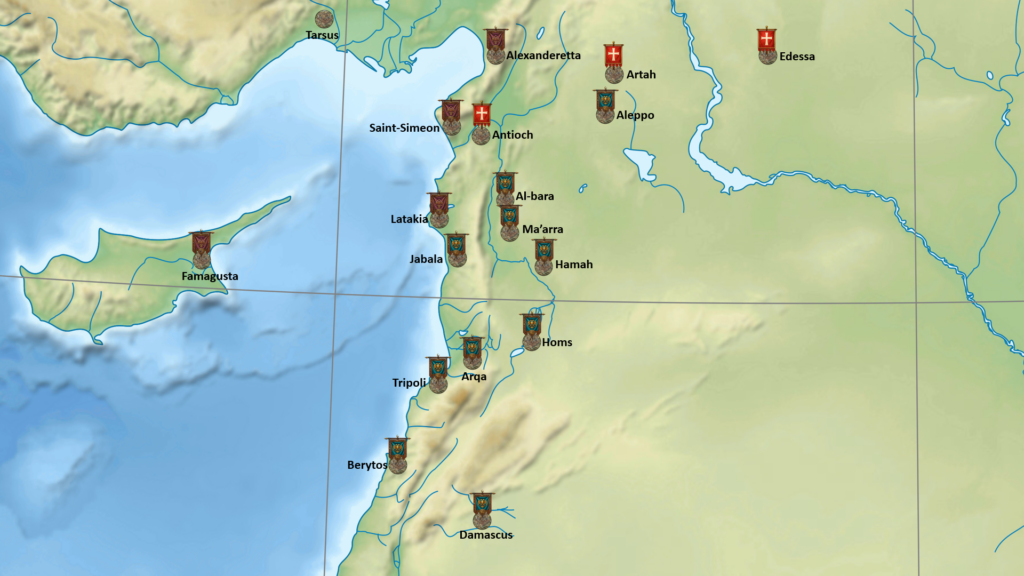
Bohemond and the southern Italians divided their time between Antioch and Cilicia to the northwest. Raymond of Toulouse and the southern French established themselves in the Ruj Valley, southeast of Antioch. Godfrey of Bouillon and many of the northern French, meanwhile, moved toward the region around Edessa.
At the same time, the composition and internal structure of the Crusader contingents were undergoing significant change. The hardships of the preceding months, together with death, desertion, and financial exhaustion, had weakened the complex network of relationships that had previously held the Crusaders together. Family connections, lordship, and bonds of vassalage were increasingly disrupted, creating an unstable political and military environment.
During the summer of 1098, many Crusaders therefore sought to establish new relationships with different lords and to align themselves with new interests. In early July, the princes issued a general proclamation at Antioch offering military service to poor men who lacked sufficient gold or silver to continue the expedition. Those willing to remain with the Crusade were promised the opportunity to enter their service.
This recruitment contributed to a gradual redistribution of power within the Crusader army. Some experienced knights who had previously held important positions began to seek employment elsewhere. Among them were Drogo of Nesle and Reinhard of Toul, both of whom had led scouting parties monitoring Kerbogha’s approach in May. They subsequently travelled to Edessa with their followers, where they entered the service of Baldwin of Boulogne in return for military rewards. The long expedition had left them and their men severely impoverished, making continued service under a new lord an attractive means of securing their livelihood.
By contrast, wealthy leaders such as Baldwin of Boulogne were able to use their resources to attract new followers and strengthen their own military households. Other prominent knights likewise began adopting increasingly independent and pragmatic measures to secure their position and ensure their survival.
Raymond Pilet’s Campaign
One of the first knights to seek his fortune independently was the Provençal knight Raymond Pilet. Around 17 July 1098, after having served in the army of Raymond of Toulouse, Pilet gathered a number of knights and infantrymen under his command and set out southward from the Ruj Valley on a semi-independent expedition.
His objectives appear to have been relatively straightforward: to capture settlements and acquire booty. He entered the Jabal as-Summaq, a plateau southeast of Antioch where Bohemond and Robert of Flanders had previously attempted to forage in December 1097. On that earlier occasion, the Crusaders had encountered a large force from Damascus.
Pilet initially met with considerably greater success. The Syrian Christian inhabitants of a small fortress at Tell Mannas surrendered to him, allowing him to establish a base from which he could raid the surrounding countryside. About a week later, another nearby fortress, occupied by Muslims, was captured by a direct assault and subsequently plundered.
According to one Crusader account, Pilet’s men captured the peasants of the surrounding district and killed those who refused to accept Christianity, while sparing those who agreed to convert. If this account is reliable, the episode represents an important development in the religious character of the expedition. Since the massacres of Jews during the Rhineland persecutions of 1096, this appears to be one of the earliest recorded instances in which the First Crusade moved toward the forcible conversion of local populations. The demand that captives accept Christianity or face death blurred the distinction between military conquest and religious coercion.
Raymond Pilet’s expedition had so far been remarkably successful, but his growing confidence soon led him to pursue a more ambitious objective. He was approached by a group of Syrian Christians from Ma‘arra, the largest town in the surrounding region. The town held considerable commercial and strategic importance because it stood along the ancient Roman road linking Aleppo with Damascus. Known today as Ma‘arrat al-Nu‘man, Ma‘arra was a relatively compact and densely populated city, yet remarkably heavily fortified for its size. Its size and defenses placed it well beyond the capabilities of a minor warlord such as Raymond Pilet to capture on his own.
Encouraged by the Syrian Christians, Raymond Pilet agreed to attack Ma‘arra’s Muslim garrison. Confident after his recent successes, he set out from Tell Mannas on 27 July 1098. Ma‘arra was less than half a day’s march away, but Pilet appears to have seriously underestimated the resistance he would face. He consequently brought only a limited supply of water, a serious error in the intense heat of the Syrian summer.
When Pilet reached Ma‘arra, he found that its defenders were far stronger than he had anticipated. Instead of the weak garrison he had expected, Pilet was confronted by a sizeable force of Aleppan troops who had marched out of the city to meet him. What Pilet had expected to be a relatively simple attack therefore developed into a major engagement.
The fighting continued throughout the day and into the evening. The intense heat, combined with the Crusaders’ lack of water, placed them under severe strain. Unable to endure their thirst and increasingly concerned for their safety, the Crusaders attempted to withdraw toward their fortress at Tell Mannas. The Syrians and poorer pilgrims accompanying Pilet were overcome by panic and began retreating in disorder.
Raymond Pilet’s attack ended in a complete rout, with his forces suffering significant casualties during the disorderly retreat. One contemporary account grimly records that “many of our people gave up their souls to God” in the chaos. Among the dead was Arnold Tudebode, a relative of the Crusade’s chronicler Peter Tudebode. Pilet’s expedition ultimately ended in failure. After several days, his battered force withdrew to the Ruj Valley. Nevertheless, the expedition demonstrated that further conquests in the region might be possible.
The Loss of Papal Authority
Meanwhile, events in Antioch took a tragic turn. Although most of the Crusader forces had dispersed across northern Syria, many remained in the city, particularly poorer pilgrims and soldiers. Bishop Adhemar of Le Puy, the papal legate and spiritual leader of the Crusade, chose to stay with them. This decision would have serious consequences.
In the final days of July, a severe illness reportedly began spreading through Antioch. One contemporary account describes it as a deadly plague that claimed the lives of many members of the Crusader army, including both prominent nobles and ordinary soldiers. Adhemar was said to have been among the first victims, dying on 1 August 1098.
His death caused profound grief among the Crusaders. According to the same account, the princes and other members of the army agreed to bury him inside the Basilica of St Peter, close to the place where the Holy Lance had reportedly been discovered.
The exact cause of bishop Adhemar’s death, however, remains uncertain. Some modern accounts have suggested that he may have died from an epidemic, possibly typhus, but this diagnosis cannot be established with confidence. Significantly, other contemporary chroniclers, including writers who were present during the crisis, do not describe an epidemic at all. In their accounts, Adhemar simply fell ill and died. His death nevertheless removed the Crusade’s principal papal representative and spiritual authority at a critical moment, further weakening the expedition’s cohesion.
Regional Alliances and the Transformed Geopolitics of Northern Syria
At roughly the same time, Bohemond sought to strengthen his position in Cilician Armenia. His nephew, Tancred, had established a Norman presence in the region in the early autumn of 1097, providing the foundation for a stronger connection between Bohemond and Cilicia.
During the summer of 1098, Bohemond spent an extended period in the region, probably using the town of Mamistra as his principal base on the eastern edge of the Cilician plain. The area offered considerable economic advantages. Its fertile lands could provide food for Bohemond’s forces, while its fisheries and textile production promised substantial sources of wealth in the future. Cilicia was also important for its strategic position. Situated between northern Syria and Anatolia, the region provided Bohemond with a valuable base from which he could strengthen his influence and protect his interests beyond Antioch.
From July 1098 onward, Bohemond increasingly focused on consolidating his position in northern Syria rather than preparing to lead the Crusader army toward Jerusalem. This created an opportunity for another prominent prince to emerge as a potential leader: Godfrey of Bouillon, Duke of Lower Lotharingia.
As summer gave way to autumn, Godfrey’s standing among the Crusaders grew. His rise was partly supported by his brother, Baldwin of Boulogne, who was primarily concerned with strengthening his own position in Edessa, more than 150 kilometres northeast of Antioch. In March 1098, Baldwin had granted Godfrey rights to the revenues and agricultural produce of Tell Bashir, a settlement located on the route to Edessa. By the summer, Godfrey had also acquired similar rights over the neighbouring town of Ravendan.
The revenues from these territories could be substantial. One commentator, probably exaggerating, claimed that Tell Bashir alone generated 500,000 gold bezants annually, an enormous sum by contemporary standards. In July, Godfrey moved into the region, and his increased wealth may have helped him attract a significant number of new followers.
His reputation received a further boost when Omar of Azaz, a local Muslim ruler, approached him seeking assistance. This contact demonstrated that Godfrey was becoming an increasingly influential figure in the region, with a growing network of political relationships beyond the Crusader leadership itself.
The chronicler Albert of Aachen, who was strongly favourable toward Godfrey, provides a vivid account of how this relationship developed. According to Albert, a knight in Godfrey’s retinue named Fulbert of Bouillon was ambushed and killed by troops from Azaz while travelling toward Edessa with his wife. Fulbert was decapitated, while his wife was taken captive because of her beauty and was later forced to marry one of Omar’s lieutenants.
At the time, Azaz was under the authority of Ridwan of Aleppo. However, the arrival of the First Crusade had weakened Ridwan’s control over the surrounding region, giving Omar an opportunity to pursue greater independence. Albert suggests that Omar subsequently sought an alliance with Godfrey partly because Fulbert’s widow had portrayed Godfrey as the most influential leader among the Franks.
This account should be treated with some caution, particularly because Albert’s admiration for Godfrey may have influenced the way he presented the episode. Nevertheless, it illustrates the changing political landscape of northern Syria, where local rulers could exploit the disruption caused by the Crusader invasion to pursue their own political interests.
Omar may, in fact, have approached Godfrey for a more practical reason: Godfrey was simply the nearest Crusader leader available to him. Azaz lay along the old Roman road connecting Tell Bashir with Antioch, placing it within Godfrey’s sphere of activity. Regardless of Omar’s precise motives, his decision to seek Frankish assistance demonstrated that the Crusaders had become part of the political landscape of the Levant. Relations between the Franks and local Muslim rulers were becoming more complex, and the boundaries between open hostility and political cooperation were increasingly blurred.
In early September 1098, Ridwan of Aleppo was preparing to attack Azaz, leaving Omar in urgent need of assistance. He therefore sent a Syrian Christian envoy to Godfrey to request his help and offered his own son as a hostage as a guarantee of his intentions. Godfrey eventually agreed to intervene, and the news of his decision was reportedly conveyed to Azaz by carrier pigeon.
Godfrey then led a relief force toward Azaz. His arrival was enough to cause the Aleppan army to withdraw without a major engagement. Recognising the political value of Godfrey’s new alliance, Raymond of Toulouse and Bohemond hurried from Antioch in an attempt to establish their own relationship with Omar, but they arrived too late. Omar regarded Godfrey as the man who had saved Azaz and rewarded him generously, including with an elaborately decorated suit of armour described as being richly inlaid with gold and silver.
Omar’s alliance with the Crusaders initially appeared to have secured his independence from Aleppo. However, his position soon deteriorated. Within a year, his son died while in the Crusader camp, probably from illness rather than deliberate harm. When the Crusader forces subsequently moved south, Omar was left without their protection. He was eventually captured by Aleppan troops and brought before Ridwan. Omar pleaded for his life and promised to remain permanently obedient to the ruler of Aleppo, but Ridwan refused to spare him and ordered his execution.
The episode illustrates both the opportunities and the dangers created by the Crusaders’ growing involvement in the political affairs of northern Syria. Yet their increasing participation in local politics also highlighted a deeper problem within the expedition. Jerusalem remained the stated objective, but the Crusader leadership was increasingly occupied with territorial disputes, alliances, and opportunities in northern Syria. The expedition therefore possessed a clear ultimate goal, while its leading princes showed little willingness to pursue it immediately.
Religious Patronage and Crusader Leadership Politics
By the late summer of 1098, Bohemond had largely withdrawn from the struggle for leadership of the Crusade. This strengthened Raymond IV of Toulouse’s position. His age and experience already gave him considerable prestige, while his strong support among the southern French provided him with an established political base. Two additional developments now further increased his influence.
The reorganisation of alliances and personal loyalties following the second siege of Antioch worked to Raymond’s advantage. As one of the wealthiest Crusader princes, he had the resources to attract large numbers of new followers, perhaps numbering in the hundreds or even thousands. His wealth also enabled him to secure support from unexpected quarters. Around this time, the anonymous author of the Gesta Francorum, who had previously spent much of the expedition alongside Bohemond, appears to have begun travelling with the southern French. From this point onward, his portrayal of Raymond becomes noticeably more favourable, suggesting a change in the author’s associations and perhaps in his perspective on the Crusader leadership.
Raymond’s association with the Holy Lance also became increasingly important during this period. From the moment of its discovery, he had sought to establish a close connection with the relic. Having played a prominent role in its discovery, he now presented himself as its protector and defender. His supporter and chaplain, Raymond of Aguilers, repeatedly emphasised this relationship in his account, helping to reinforce Raymond’s association with one of the most important religious symbols of the Crusade.
This did not mean that the Crusaders had suddenly accepted Raymond of Toulouse as their undisputed leader. Rather, the passage reflects the kind of political messaging about Raymond that circulated from July 1098 onward. Raymond sought to persuade the Franks that his association with the Holy Lance made him the natural candidate for leadership, and he appears to have genuinely believed in the political importance of that connection.
His position became even more significant after the defeat of Kerbogha. Raymond carefully promoted the cult surrounding the relic, managing its public image in a way that strengthened his own political standing. Peter Bartholomew, who claimed to have discovered the Holy Lance, played a central role in this effort. His popularity and influence continued to grow alongside the reputation of the relic itself.
At the same time, the visions attributed to Peter Bartholomew increasingly contained messages that supported Raymond’s interests. Whether these developments resulted from deliberate political calculation or from Peter Bartholomew’s own convictions is difficult to determine. Nevertheless, his visions became progressively more explicit in their support for Raymond’s leadership and political ambitions.
By the end of the summer, the crisis within the Crusade remained unresolved. Hugh of Vermandois and Baldwin of Hainaut, who had been sent as ambassadors to Emperor Alexios, encountered a Turkish attack while making their way back across Asia Minor. Baldwin was killed or disappeared during the journey, while Hugh’s return was seriously delayed.
By the time Hugh finally reached Constantinople and reported the defeat of Kerbogha, autumn had already arrived. It was therefore too late in the campaigning season for Alexios to undertake an expedition to Antioch. Although no Byzantine representative arrived to assert the emperor’s claim to the city, Raymond of Toulouse continued to resist any attempt to place Antioch entirely under Bohemond’s control.
At this stage, none of the Crusader leaders possessed enough authority to resolve the dispute or give the expedition a clear sense of direction. The Crusader leaders therefore wrote to Pope Urban II on 11 September 1098, informing him of their difficulties and seeking his guidance.
Crusader-Fatimid Diplomacy
Although the prolonged delay was increasingly frustrating for the poorer Crusaders, it also offered several advantages to the expedition’s leaders. Diplomatic negotiations with the Fatimid Egyptians continued, and the Egyptian envoys who had arrived in Antioch were accompanied on their return to Cairo by Christian representatives.
The defeat of Kerbogha had also transformed the political situation in the region. In July 1098, the Fatimids recovered Jerusalem from the Ortoqids, fundamentally changing the balance of power in Palestine. The Crusaders and Fatimids had previously shared an interest in opposing the expansion of the Turkish powers, but the situation had now changed. With Jerusalem under Fatimid control, further Crusader expansion into Palestine threatened Egyptian interests directly.
Negotiations nevertheless continued until May 1099. Christian envoys even spent Easter of 1099 in Jerusalem, celebrating at the Church of the Holy Sepulchre. Following the difficult and costly experience at Antioch, the western commanders had little reason to rush into another campaign against a well-defended enemy without first exploring the possibility of a diplomatic settlement.
The extended stay in northern Syria also allowed the Crusaders to strengthen their position in the region and establish the foundations of more permanent Crusader rule. One example was the creation of a Latin bishopric at al-Bara, roughly twenty miles southeast of Antioch. The delay therefore served the territorial ambitions of the western nobles and knights as well as those of the leading princes, many of whom were increasingly focused on acquiring and consolidating their own lands and resources.
Expanding the Frontier
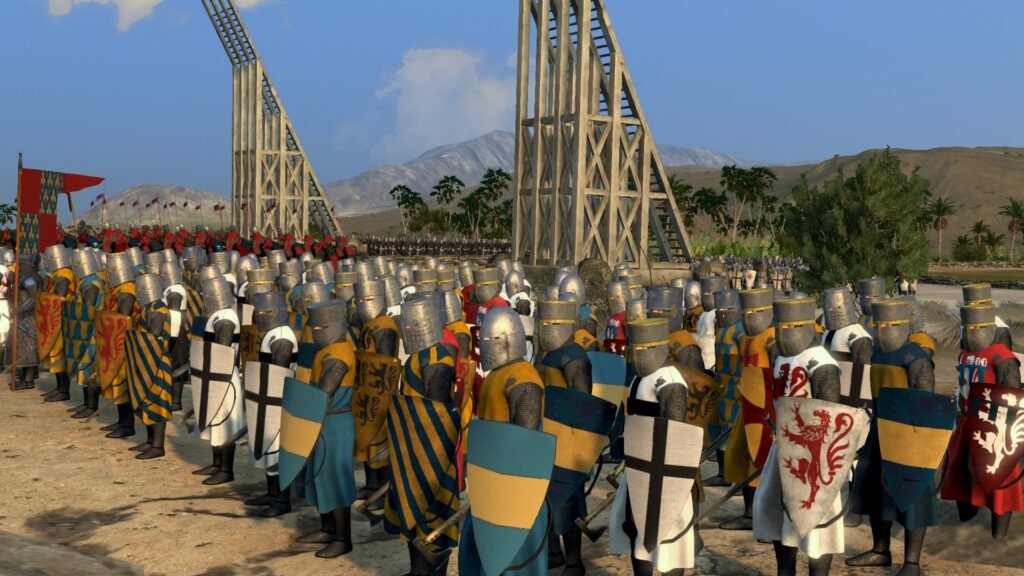
Meanwhile, influenced by the visions of Peter Bartholomew and the supposed guidance of St Andrew, Raymond of Toulouse adopted a compromise. Rather than committing immediately to a direct march toward Jerusalem, he decided to lead his army southward toward the Jabal as-Summaq plateau, following the route previously taken by Raymond Pilet.
This movement could, at least in a broad sense, be presented as an initial step toward Jerusalem. Raymond himself could also justify the expedition as an effort to secure additional supplies for the poorer members of the Crusade. Yet there was a further political motive. By expanding into territory that Bohemond might otherwise seek to control from Antioch, Raymond could strengthen his own position while continuing to pressure his rival.
Raymond’s first major objective was al-Bara, a settlement that had once been a prosperous trading centre but had declined considerably by the eleventh century. By this time, it was a relatively small town inhabited by a predominantly Muslim population, surrounded by the remains of earlier Roman structures.
Raymond’s objective at al-Bara went beyond simply acquiring supplies. He intended to establish a permanent Christian settlement there by removing the existing Muslim population and replacing it with new Christian inhabitants. One contemporary writer described this policy in explicitly colonial terms, stating that Raymond intended to fill the town with new coloni, or settlers. Raymond had already occupied Rugia on the Orontes, approximately thirty miles from Antioch. From there, he advanced against al-Bara to the southeast.
The Muslim inhabitants of the town eventually surrendered. According to contemporary accounts, however, they were either killed or taken captive and sold as slaves in Antioch, while Christians were brought in to repopulate the settlement. The mosque was subsequently converted into a church. Raymond then appointed one of his priests, Peter of Narbonne, as bishop of the newly established Christian community, further demonstrating his intention to transform al-Bara from a conquered settlement into a permanent centre of Latin Christian rule.
Political Deadlock & Popular Ultimatums
After securing al-Bara, Raymond left most of his followers behind and returned to Antioch, where the Crusader leaders were expected to prepare for the planned departure toward Jerusalem in early November. The other princes had already gathered in the city. Godfrey of Bouillon arrived with a considerable number of Muslim captives, some of whom were reportedly forced to carry the severed heads of their dead companions. The Count of Flanders and the Duke of Normandy were also present, while Bohemond, who had been ill in Cilicia, arrived two days later.
As the dispute dragged on, the ordinary Crusaders grew increasingly impatient. Encouraged by the preaching and visions of Peter Bartholomew, they demanded that the army move on to Jerusalem. They warned that if the princes continued fighting over Antioch, they would destroy the city’s walls and leave. Alarmed by the threat, the princes were finally forced to meet privately and negotiate a temporary compromise.
On 5 November, the princes and their advisers assembled in the Cathedral of St Peter to discuss the future of the expedition. Yet despite the stated intention of marching south, there was little enthusiasm for leaving Antioch. The principal obstacle was once again Raymond of Toulouse. He declared that he would not agree to surrender Antioch to Bohemond, arguing that doing so would violate the oath he had sworn to Emperor Alexios I.
Raymond also possessed a strong practical position. His followers still controlled the Bridge Gate and the former palace of Yaghi-Siyan, while his recent occupation of al-Bara had given him another territorial foothold in northern Syria. Bohemond reacted angrily, and the other princes appear to have been broadly sympathetic to his position.
Raymond’s insistence on defending the emperor’s claim was particularly striking because of his earlier conduct at Constantinople, where he had presented himself as a man determined to honour his commitments without yielding to Byzantine pressure. His renewed insistence on Alexios’s rights therefore appeared to his opponents less like a consistent principle and more like a convenient justification for preventing Bohemond from gaining exclusive control of Antioch.
The dispute continued for several days, while the soldiers and pilgrims waiting outside Antioch became increasingly impatient. Their primary concern was to fulfil the vows that had brought them on the Crusade and continue toward Jerusalem. After months of hardship and delay, they were eager to leave Antioch and resume the march south.
Encouraged by the preaching and visions of Peter Bartholomew, the rank-and-file eventually presented their leaders with an ultimatum. They declared that those who wished to profit from Antioch could remain there, while those who expected rewards from Emperor Alexios could wait for him. They themselves, however, intended to continue to Jerusalem. If the princes continued their dispute over Antioch, they threatened to destroy the city’s walls before departing.
The threat alarmed the Crusader leadership, particularly because the dispute between Raymond of Toulouse and Bohemond risked developing into open violence. The more moderate princes therefore proposed a private meeting involving only the leading nobles. After further heated arguments, a temporary compromise was reached.
Raymond agreed to accept whatever decision the Crusader council eventually made concerning Antioch, provided that Bohemond swore to accompany the expedition to Jerusalem. Bohemond, in turn, swore before the bishops that he would neither delay the Crusade nor obstruct its progress for the sake of his own ambitions.
The dispute over Antioch itself remained unresolved. Bohemond nevertheless retained control of the citadel and roughly three-quarters of the city, while Raymond continued to hold the fortified bridge and the former palace of Yaghi-Siyan, which he entrusted to William Ermingar.
The date of the march to Jerusalem was still not fixed. In the meantime, the princes decided to occupy the army with an attack on Ma‘arra, a strategically important fortress whose capture would help secure the Crusaders’ left flank when they eventually advanced south toward Palestine.
Reconstructing the 1098 Siege of Ma‘arra
On 23 November 1098, Raymond returned to al-Bara, this time accompanied by Robert of Flanders. Rather than remaining there to rest for the month, the two princes soon resumed their advance. By 27 November, they had reached the vicinity of their next objective: the city of Ma‘arra. Its defenders had earlier defeated Raymond Pilet and his combined force of Provençal and Syrian fighters, making the city a significant target for the Crusaders.
According to the chaplain Raymond of Aguilers, the people of Ma‘arra had grown overconfident after their earlier victory over Raymond Pilet. The citizens were therefore determined to resist the approaching Crusader army, having already demonstrated during the summer that they could defeat a Crusader force. Ma‘arra was neither a particularly large nor an important settlement, and its defensive strength was limited. The city walls enclosed an area of only about five square kilometres, and the town may also have possessed a citadel. Situated on a flat plain, Ma‘arra had few natural advantages that could aid its defence.
As the Crusaders moved up to the walls of Ma‘arra on 28 November, the city’s inhabitants gathered on the ramparts and openly taunted the besiegers. They mocked the Crusader leaders and, according to contemporary accounts, desecrated crosses in an apparent attempt to provoke them.
Raymond and Robert of Flanders, likely angered by the defenders’ actions and the frustration of their followers, decided to launch an immediate assault on the city. The attack, however, failed because the Crusaders lacked sufficient siege ladders. They had only two, both described as “short and fragile,” while at least four more were needed to reach the walls effectively.
Bohemond arrived shortly afterward, perhaps giving the impression that the earlier assault might have succeeded had the Crusaders waited for him. Although Ma‘arra was relatively small and not heavily fortified, its defences were strong enough to withstand the initial Crusader attacks, whether Bohemond was present or not. A new assault was therefore launched on 29 November. The Crusaders attempted to fill in a ditch that lay in front of the walls, hoping to create a passage for their forces. This effort also failed, and the defenders continued to hold the city.
Realising that another approach was necessary, the three princes met in council to discuss how the siege should proceed. Ma‘arra required a different strategy from the one used at Antioch. Because the town was relatively small, the Crusaders could attempt to surround it closely and prevent supplies from entering. However, relying on starvation would take considerable time, and there was a serious danger that the Crusaders themselves would run out of food before the defenders surrendered.
This problem became increasingly severe as winter set in. The Crusaders’ supply lines began to come under pressure, and within a week their food reserves were already beginning to decline. Once again, as had happened during the siege of Antioch, hunger became a serious problem among the ordinary soldiers.
In an effort to reassure the increasingly desperate army, Peter Bartholomew claimed that he had received another vision. According to his account, St Andrew had appeared to him once more, this time accompanied by his brother, St Peter. The two apostles had come both to rebuke the Crusaders and to offer them reassurance.
They explained that the army’s suffering was a consequence of its own sins. The Crusaders had forgotten the blessings they had previously received and had failed to appreciate fully the miracle of the Holy Lance. They were also accused of serious wrongdoing, including theft, adultery, and violence against the poor. If they genuinely repented, restored justice, married the women with whom they were living outside marriage, and regularly gave tithes to the poor, the apostles promised that God’s mercy would return to them.
Under these circumstances, the Crusader princes needed to bring the siege of Ma‘arra to a quick conclusion. The Muslim garrison had rejected their offers of a negotiated surrender, leaving the Crusaders to adopt a more aggressive strategy based on direct assaults. This approach placed different demands on the attackers and defenders. The Crusaders’ main objective was to break through the city’s defences, since once a breach had been created, their numerical superiority could be used to overwhelm the defenders inside the relatively confined town. The garrison, meanwhile, had to prevent the Crusaders from gaining access to the walls by whatever means were available.
Fortunately, two chroniclers of the First Crusade, Raymond of Aguilers and the anonymous author of the Gesta Francorum, were present during the siege and recorded what they witnessed. When their accounts are combined with surviving Arabic sources, they provide a detailed picture of the military methods used at Ma‘arra.
The Crusaders first sought to make their approach easier by filling sections of the dry moat surrounding the city. They then attempted to overcome the walls in two principal ways: by weakening them until they collapsed or by climbing over them. To achieve the first, the Crusaders employed sappers to undermine the walls. In its more advanced form, this technique involved digging tunnels beneath a wall and then bringing them down to weaken its foundations. The Crusaders had already used such methods during the siege of Nicaea, but at Ma‘arra they appear to have employed a simpler and faster technique.
The response of the Muslim defenders suggests that the Crusaders were working directly at the base of the walls. One contemporary account records that the defenders hurled stones from catapults, darts, fire, beehives, and lime at the men attempting to undermine the fortifications. Such attacks would have been intended to drive the Crusaders away from the walls and prevent them from damaging the masonry.
For the most part, however, the Crusaders—particularly the Provençals—focused on finding ways to climb over the walls rather than bringing them down. Trees from a nearby woodland were cut down and used to construct larger and stronger ladders. The most important development, however, was the construction of a formidable siege tower.
Psychological Warfare & Human Horror: The Reality of Cannibalism at Ma‘arra
Meanwhile, severe hunger, combined with the increasingly intense religious atmosphere surrounding Peter Bartholomew’s visions, drove some members of the Crusader army to an extreme and horrifying response: cannibalism. Unlike the alleged incident at Antioch, however, this time the practice appears to have been genuine. Moreover, some Crusaders seem to have deliberately publicised what they had done, recognising that such acts could be used to frighten the defenders of Ma‘arra.
Fulcher of Chartres, reporting information he had received from Edessa, described the practice with evident horror: “I tremble to say it, but many of our men, seized by the madness of hunger, cut pieces from the buttocks of the Saracens, who were dead at the time, which they cooked and ate, and even if they were barely warmed over they savagely filled their mouths and devoured them.” Another chronicler claimed to have learned about the events directly from some of those who had taken part. According to his account, “Adults were put in the stewpot, and boys were skewered on spits. Both were cooked and eaten.”
The accounts should be treated with some caution, particularly because medieval chroniclers sometimes exaggerated acts of brutality. Nevertheless, several sources describe cannibalism at Ma‘arra, making it difficult to dismiss the episode entirely. If Bohemond had previously staged an apparent act of cannibalism at Antioch to frighten and identify Turkish spies, the situation at Ma‘arra was different: the Crusaders appear to have genuinely resorted to cannibalism and, at least in some accounts, deliberately used it to terrify their opponents.
The Final Breach & Widespread Violence
Finally, on 11 December, after Peter Bartholomew had announced that victory was near, the Crusaders launched their final assault on Ma‘arra. The situation within the army had become increasingly desperate: some soldiers were suffering from severe hunger, others had resorted to eating the dead, and the leading princes remained deeply divided. The attack was made from two sides. On Bohemond’s sector, his men relied entirely on ladders but made little progress against the walls.
The Provençal forces, meanwhile, advanced their siege tower toward the city. The defenders concentrated their fire on the tower, using catapults to bombard it, while also attempting unsuccessfully to set it alight. Raymond of Aguilers additionally records that they threw lime and beehives at the Crusaders. The Crusaders themselves appear not to have possessed catapults during the assault. The defenders’ attention was largely drawn toward the siege tower, allowing the Crusaders to bring forward ladders protected by mantlets.
From the top of the siege tower, a knight named Evrard “the Hunter” repeatedly sounded his trumpet, perhaps also using his bow to shoot at the defenders below. Other knights crowded onto the upper levels of the tower and hurled stones at the men defending the walls. These stones proved more effective than arrows, striking the defenders’ shields with enough force to knock some of them from the walls and send them falling into the city.
By the end of the day, with the sun beginning to set, the Provençal forces had cleared enough space on the ramparts to place a ladder against the wall. Protected by the siege tower, whose occupants continued to fire arrows and hurl debris at the defenders, the knight Gouffier of Lastours climbed the ladder. He was quickly followed by a large number of Crusaders eager to bring the assault to an end.
So many men crowded onto the ladder that it began to break under their weight, sending several heavily armoured soldiers crashing to the ground. Gouffier and a small group of warriors nevertheless managed to establish a position on the ramparts. According to one account, Gouffier fought off the defenders “like a bear beating back a pack of yipping dogs.” Seeing their comrades on the walls, the Crusaders below quickly constructed another ladder. Soon, several dozen men had joined Gouffier and began expanding their foothold along the ramparts.
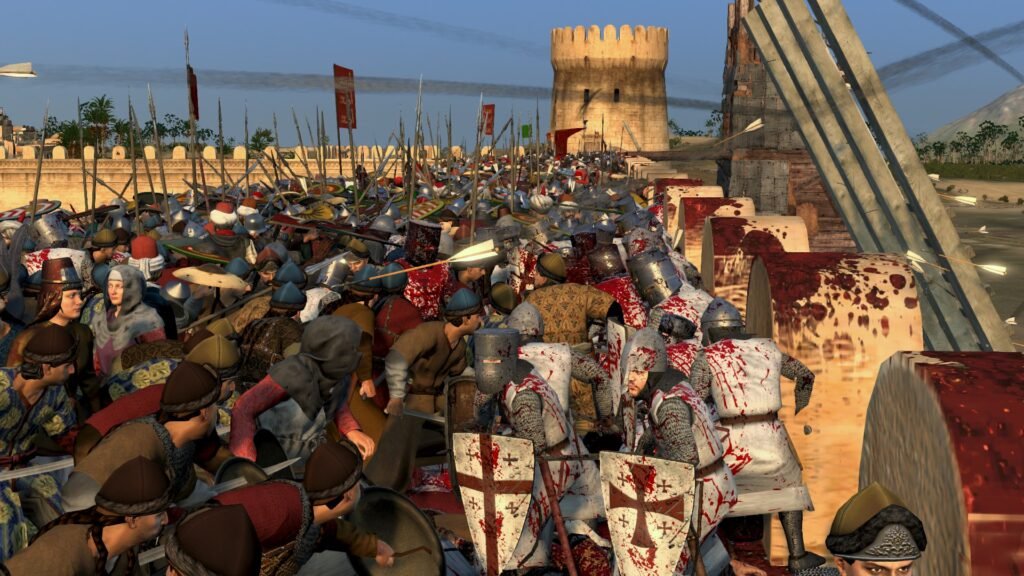
The fighting remained fierce. Some defenders, overwhelmed by the continual assault of arrows, stones, swords, and fire, reportedly chose to leap from the walls rather than continue the struggle. The battle continued until nightfall, by which time the Crusaders had secured a substantial section of the walls and probably captured one or more towers. They had also broken through one of the city gates. With the defences breached and a significant part of the walls in Crusader hands, the capture of Ma‘arra appeared almost certain by the following morning.
When the fighting resumed the following morning, the capture of Ma‘arra was followed by widespread violence. Crusader forces poured into the town, killing many of the inhabitants they encountered and forcing their way into houses, which they looted and set on fire. The attack was therefore not limited to the city’s defenders but extended to the civilian population as well. The refugees who had placed themselves under Bohemond’s protection suffered a particularly grim fate. The men among them were killed, while the women and children were taken captive and sold into slavery.
The decision to attack Ma‘arra is difficult to explain given the town’s relatively limited importance. During the later stages of the Crusade, the Crusaders would pass by much more significant settlements, sometimes after securing agreements that guaranteed them safe passage, and sometimes without reaching any agreement at all, as happened at Sidon. One possible explanation is that the Crusader leaders considered it a matter of prestige to punish a town that had previously resisted and defeated their forces.
Another possibility is that the siege served a useful purpose at a time when unity within the Crusader army remained fragile. Ma‘arra lay close to the edge of the territory controlled by the Provençal forces, with al-Bara only about ten kilometres away. Attacking the town could therefore satisfy those Crusaders who were demanding further military action while also bringing the army into enemy territory where supplies could be obtained through raiding. Whatever the precise motives behind the decision, the siege ultimately proved a major military success for the Crusaders.
From Ma‘arra to Palestine
During the siege, the forces of Bohemond and Raymond had cooperated uneasily. After the capture of Ma‘arra, tensions between the two groups intensified once again. Bohemond was accused of using his position to secure a larger share of the town’s wealth, even though Raymond’s forces had played the leading role in capturing it. The dispute quickly revived the hostility between the southern French and the Normans.
Raymond claimed Ma‘arra for himself and intended to place the town under the authority of the bishop of al-Bara. Bohemond, however, refused to withdraw his troops unless Raymond gave up his territorial position in Antioch. Bohemond also began openly challenging the authenticity of the visions reported by Peter Bartholomew, thereby attacking one of the principal sources of religious authority supporting Raymond’s position.
Meanwhile, dissatisfaction spread throughout the Crusader army. Raymond’s troops were particularly insistent that the march toward Jerusalem should resume. Around Christmas, representatives of the soldiers approached Raymond and indicated that, if he took responsibility for organising the departure, the army would recognise him as the leader of the entire Crusade.
Raymond appears to have felt unable to reject their demand. A few days later, he left Ma‘arra for Rugia and announced that the Crusader army was preparing to resume its march toward Palestine. Bohemond responded by returning to Antioch, while Ma‘arra was placed under the authority of the bishop of al-Bara.
Around 4 January 1099, the princes assembled at Rugia in one final attempt to settle the dispute over Antioch. As expected, however, neither Bohemond nor Raymond was willing to give up his position, and the council failed to produce a compromise. Raymond’s actions at the meeting may explain why he had called the council in the first place. With the leading princes gathered together, he attempted to secure their support through financial offers. His chaplain, Raymond of Aguilers, reported that Raymond offered 10,000 solidi each to Godfrey of Bouillon and Robert of Normandy, 6,000 to Robert of Flanders, and 5,000 to Tancred, with smaller amounts promised to the other princes. These were substantial sums.
Raymond may have presented the payments as financial support for the continuation of the Crusade, but they also served a clear political purpose: securing recognition of his position as leader of the expedition. The offers, however, did not immediately win over all the princes. Of the four specifically named, only Robert of Normandy and Tancred appear to have accepted Raymond’s side at this stage.
From the middle of January, Robert of Normandy and his followers joined the southern French forces. More significantly, Tancred also broke with Bohemond. His separation from his uncle had been developing gradually since the summer of 1097, as Tancred established his own position and became increasingly independent. He now went further by apparently entering Raymond’s service, marking a decisive break from Bohemond’s camp.
Godfrey of Bouillon, meanwhile, continued to remain neutral in the dispute. Robert of Flanders, who had previously accompanied Raymond into the Jabal as-Summaq, now appears to have withdrawn his support from the Provençal camp. His change of allegiance may have been influenced by growing dissatisfaction with Raymond’s attempts to secure political support through financial rewards. Robert subsequently returned to Antioch and joined Bohemond once again.
Despite losing Robert’s support, Raymond emerged from the council at Rugia in a stronger position. Although he had not been formally recognised as the undisputed leader of the Crusade, but the alliances he had secured left him as the most influential prince within the expedition.
Events at Ma‘arra took an unexpected turn after Raymond’s departure. In his absence, Peter of Narbonne began making preparations to garrison the town with knights and infantry drawn from the Crusader army. However, news of these plans quickly spread among the rank and file. When it became clear that Raymond intended to keep control of Ma‘arra despite his earlier promises, thereby prolonging his dispute with Bohemond, open resistance broke out.
The poorer members of the army responded with a remarkable act of collective disobedience. Determined to prevent Ma‘arra from becoming another source of delay and political conflict, they began dismantling the town’s walls and fortifications, removing the stones one by one so that the city could no longer be effectively defended. One contemporary account vividly describes how even the sick and physically exhausted took part:
“Thereupon, even the sick and weak, arising from their beds and hobbling along on sticks, came all the way to the walls. An emaciated person could roll back and forth and push [stones] from the walls. The bishop of al-Bara and Raymond’s friends, exhorting and pleading against such vandalism, went about the town, but those who had scrambled from the walls and hidden at their approach were quick to resume their work as soon as the guards passed by them.”
The scale of the destruction should probably not be taken literally. Although the mob may have caused serious damage to Ma‘arra’s walls, it is unlikely that they could have completely demolished its defences within such a short period. More important than the physical destruction was the political message behind their actions. Raymond could no longer continue competing with Bohemond for control of northern Syria while simultaneously presenting himself as the leader of a Crusade whose primary purpose was the recovery of Jerusalem.
Raymond therefore had to choose between these competing objectives. He decided to place the wider purpose of the Crusade first. Rather than attempting to rebuild Ma‘arra’s fortifications, he abandoned the town as a base, at least temporarily, and turned his attention toward Jerusalem. In doing so, he effectively withdrew from the struggle for control of the Jabal as-Summaq and resumed the march toward the Holy City.
Over the following days, Raymond led a series of raids southward toward the nearby town of Kafartab in search of the food that was urgently needed, particularly by the poorer members of the army. By 13 January, the Crusaders had gathered enough supplies to leave the region.
Raymond chose to make his departure from Ma‘arra a public demonstration of his renewed commitment to the Crusade. He left the town in a religious procession alongside his clerics and the bishop of al-Bara. According to a contemporary account, they travelled barefoot, calling upon God for mercy and the saints for protection, while fires set by the departing Christians burned among the ruins of Ma‘arra. Tancred followed behind them with forty knights and a large number of infantry.
Within two days, Robert of Normandy joined the advancing army. After months of delay, political disputes, and competing interests, the Crusader expedition had finally resumed its march south toward Jerusalem. The First Crusade was now entering its final stage.
Bibliography
1) THE DEEDS OF THE FRANKS AND OTHER JERUSALEM-BOUND PILGRIMS : THE EARLIEST CHRONICLE OF THE FIRST CRUSADES | Nirmal Dass (trans.)
2) LE « LIBER » DE RAYMOND D’AGUILERS | John Hugh Hill and Laurita L. Hill (eds.)
3) A HISTORY OF THE EXPEDITION TO JERUSALEM 1095-1127 | Fulcher of Chartres / Frances Rita Ryan (trans.)
4) A HISTORY OF THE CRUSADES VOLUME I: THE FIRST CRUSADE AND THE FOUNDATION OF THE KINGDOM OF JERUSALEM | Steven Runciman
5) VICTORY IN THE EAST: A MILITARY HISTORY OF THE FIRST CRUSADE | John France
6) THE CRUSADES AND THE EXPANSION OF CATHOLIC CHRISTENDOM, 1000-1714 | John France
7) THE FIRST CRUSADE: A NEW HISTORY | Thomas Asbridge
8) GOD’S WAR: A NEW HISTORY OF THE CRUSADES | Christopher Tyerman
9) ARMIES OF HEAVEN: THE FIRST CRUSADE AND THE QUEST FOR APOCALYPSE | Jay Rubenstein
© 2026 History and War
Author: Jishu Roy
Unauthorized reproduction of this content is prohibited.