Copyright © Cyowari
The Road to Tunis
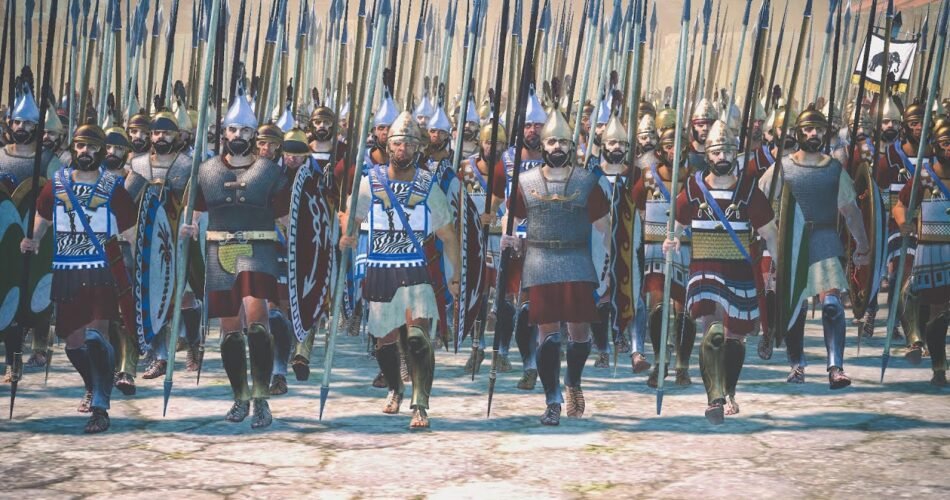
The year was 238 BC, and the Truceless War was entering its final stage. Previously, Carthage’s own mercenaries had rebelled against their former employers over unpaid wages. Led by Mathos and Spendius, the revolt quickly spread across Carthage’s African territories. At first, the Carthaginian Senate sent Hanno to deal with the crisis. While he achieved some initial success, his efforts ultimately ended in failure after the Battle of Utica in 240 BC. Realizing the severity of the threat, the Senate turned to a more capable commander—Hamilcar Barca. Hamilcar struck back hard. He crushed the rebel forces at the Battle of the Bagradas River in 240 BC and went on to massacre a large rebel army at a place called The Saw in 238 BC. With the rebel field army destroyed and most of their leaders, including Spendius, captured, the rebellion was on its last legs. Now, all eyes were on Tunis, the last major stronghold of the rebels. It was time for Carthage to end the revolt once and for all.
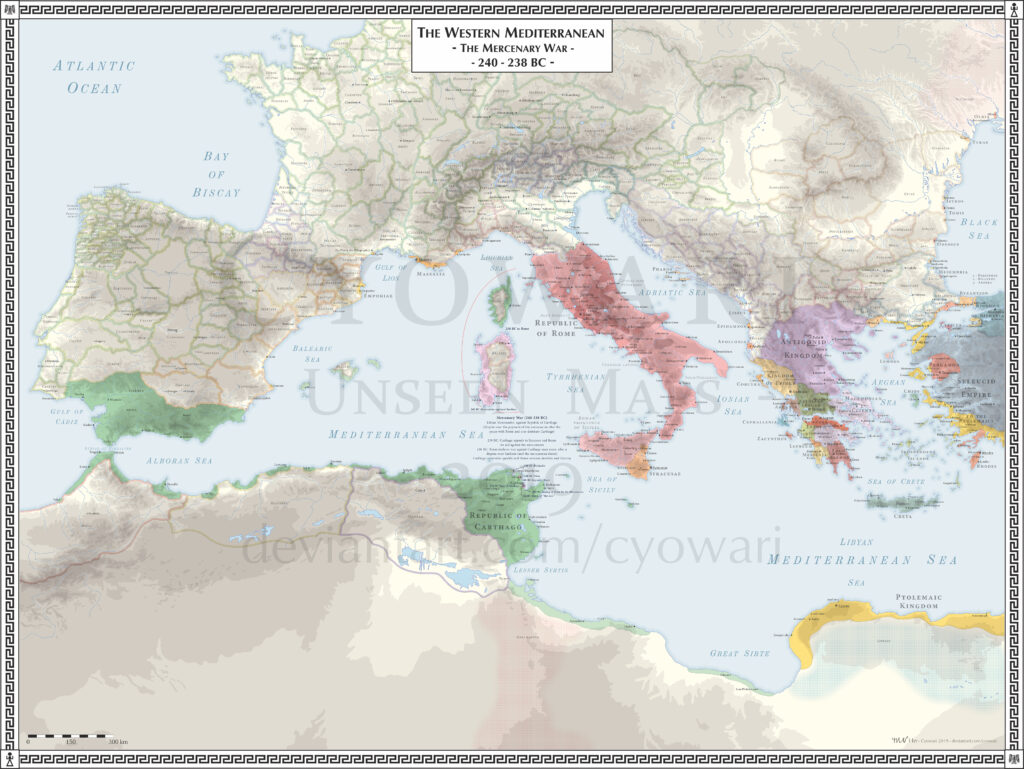
Once again, the Carthaginian forces advanced in three divisions, commanded by Hamilcar, Hannibal, and Naravas—who led the cavalry. As they moved through the countryside, they secured control over many communities, either by accepting their voluntary submission or compelling their cooperation. It is reasonable to assume that most did not require coercion, given that many Libyans were changing sides and joining them due to Carthage’s recent successes. With the main rebel forces already defeated, only a few elements remained in opposition—primarily the troops under Mathos at Tunis, along with scattered local militias and isolated garrisons of regular rebel soldiers. Most of these militias likely had little will left to continue resisting. As a result, “most of the towns” came under Punic control. This represented a notable shift from Hamilcar’s earlier inland campaign, when he had often been compelled to use force to ensure submission. However, not all of rebel-controlled Libya aligned with Carthage. Cities such as Utica and Hippo Diarrhytus continued to resist, and it is unlikely that the entire interior was brought under control in this single campaign. Such an undertaking would have required several months. Instead, the Carthaginian advance appears to have focused on the region between The Saw and Tunis—most likely encompassing the Bagradas Valley and surrounding areas between the Bagradas, Siliana, and Mellane rivers. Meanwhile, Spendius, Autaritus, Zarzas, and other rebel commanders were kept alive. Although they were undoubtedly treated harshly, Hamilcar had specific plans for them, and they were not executed—at least not immediately. Rather than being subjected to death by elephants, as was sometimes the fate of captured enemies, these rebel leaders were retained and moved with Hamilcar’s army during its next operations.
Mathos’ forces at Tunis now became the primary objective for the Carthaginians. The news of the recent defeat likely came as no great shock to him, even if he still harbored some hope that Spendius might somehow break through and rejoin him. By this point, Mathos must have realized that the rebellion was effectively lost—and that his own fate was sealed. It was merely a matter of time before Hamilcar’s victorious forces appeared on the hills and plains surrounding Tunis. In theory, the rebels could have abandoned their position and attempted to find refuge elsewhere—perhaps at Utica or Hippo Diarrhytus. But they chose to remain. This was not because Hamilcar moved too swiftly and cut off their retreat; in fact, he was still occupied in the interior, reasserting control over the countryside. Nor is it likely that the Carthaginian defenders at home would have been able—or willing—to stop the rebels from leaving. The underlying issue was that there was no truly safe destination for them. Utica, while nearby, was too small to shelter an army that may have still numbered over 20,000. Attempting a march toward Hippo Diarrhytus would have involved considerable risk, especially with Naravas and his feared cavalry likely to intercept them along the way.
Remaining positioned around Tunis did offer the rebels certain advantages. On the seaward side, there was still potential access to supplies from merchants bold enough to evade Carthaginian naval patrols. Overland, the geography provided natural defenses. Hamilcar’s army, despite its strength, could not completely encircle the town. To the west lay the salt-marsh of Sebkhet Sijoumi, while hills bordered the area to the north, south, and west.
Following the rebel defeat at The Saw in August 238 BC, the victorious Carthaginian forces likely needed a few more weeks to advance through Libya to the coast. It would not have made strategic sense to leave Mathos and the remaining rebel forces around Tunis undisturbed for an extended period, such as several months. From the Carthaginian perspective, the city of Carthage itself remained vulnerable to the threat posed by the desperate rebels at Tunis. Alternatively, the rebels could use a prolonged delay to escape and continue their resistance elsewhere. Based on this, it can be estimated that Hamilcar and Hannibal reached Tunis around the beginning of October.
Hamilcar’s Encirclement
Upon arriving near Tunis, Hamilcar divided his army into two parts. He took command of the southern position with half the forces, while his subordinate, Hannibal, established a camp to the north with the remainder. Confronted with the presence of a large Carthaginian force, Mathos abandoned the rebel camp outside the city and withdrew his troops within the walls of Tunis. Facing experienced Carthaginian soldiers—bolstered by Naravas’ cavalry and war elephants—he likely judged the city’s fortifications to offer better protection than a temporary field camp. It is reasonable to assume that Hamilcar retained Naravas and his Numidian horsemen alongside his own contingent.
These Carthaginian deployments were largely shaped by the local topography, which in any case appeared to work in their favor. By positioning forces to the north and south, the two generals were able to exert pressure on both of the city’s accessible sides. Their strategy seems to have been an attempt to replicate the earlier encirclement of Spendius’ army—this time using the city of Carthage and the Gulf of Tunis as natural barriers, much like The Saw had functioned in the previous engagement, to block any potential rebel escape routes.
Any alternative strategy would have posed serious challenges. For example, a concentrated assault on Tunis from the narrow southern approach could easily have been repelled, resulting in significant Carthaginian casualties. A northern assault carried similar risks—or worse, it might have prompted the rebels to flee southward into the Zaghouan Mountains. From there, they could have broken out into the recently subdued Libyan interior or moved toward any remaining sympathetic centers in Byzacium to reignite the conflict. Even so, the chosen strategy—a partial blockade—carried risks of its own. Although Hamilcar’s total forces were roughly equal to those of the rebels, he had now divided them around a concentrated enemy. Communication between the two Carthaginian camps and with Carthage itself could be maintained relatively easily by water, but overland movement between the two positions would have required a 25-kilometre march. Hamilcar was clearly relying on psychological pressure: the fear inspired by Naravas’ cavalry and the war elephants. He had no intention of launching a direct assault. Instead, he intended for the blockade itself—combined with fear and isolation—to erode the morale of the defenders. To that end, once the camps were established, he began with a calculated act designed to strike terror into every man inside Tunis.
The Execution of Spendius
Before long, the Carthaginians brought Spendius and the other captured rebel leaders to the walls of Tunis and crucified them in full view of the defenders. The site of the execution was likely the open ground between the northern walls of the city and Hannibal’s camp. This location also allowed citizens from nearby Carthage to witness the event, serving as a powerful morale boost for them. It is also probable that the executions were preceded by torture and mutilation, carried out in deliberate retaliation for the brutal treatment inflicted on Gisco and his companions earlier in the war. The crosses bearing the bodies were left exposed to the elements—wind, rain, and scavenging birds—to further degrade the dead and terrify the living. After overseeing this grim spectacle, Hamilcar returned to his camp. Both he and Hannibal may have believed that such a psychological blow would break the will of the defenders. Even if Mathos remained defiant, they likely hoped that his own troops, shaken by the sight, would turn against him to avoid total destruction.
Hamilcar, positioned on the lower ground and without immediate access to Carthage, maintained a heightened state of readiness in his camp, anticipating the possibility of a rebel sortie. His colleague Hannibal, by contrast, appears to have been less vigilant. Polybius notes that Mathos observed Hannibal acting “carelessly and over-confidently”. In practical terms, such carelessness likely manifested in poor patrol routines, lax sentry duties, and perhaps a general decline in discipline among the troops. The men in Hannibal’s camp may have felt secure behind their fortifications, assuming that the rebels had been thoroughly demoralised and were no longer a threat. Their proximity to Carthage may have further contributed to a false sense of safety.
Mathos Strikes Back
It likely took Mathos no more than a day or two to notice the growing complacency in Hannibal’s camp. Once confident in the situation, he acted decisively. At dawn—a time when many soldiers would still be waking and routines were most relaxed—he launched a surprise attack with a substantial force. The result was a swift and overwhelming victory. The rebel troops quickly breached the palisade, catching the defenders unprepared. Hannibal’s soldiers were either cut down in the confusion, taken prisoner, or forced to flee, while the attackers seized control of the camp and captured its contents. Though the sources do not detail what comprised the captured “baggage,” it is reasonable to infer that it included weapons and armor—items the Carthaginian troops had no time to properly don during the surprise assault. Other likely spoils included food supplies, pack animals, transport wagons, and perhaps even the military pay chest. The most significant outcome, however, was the capture of Hannibal himself. Reportedly captured with him were thirty of Carthage’s most distinguished citizens, likely high-ranking officers or political figures.
Before news of the defeat could reach Hamilcar, Mathos took swift action to reclaim the symbolic and emotional ground lost in previous weeks. He ordered the bodies of the executed rebel leaders to be taken down from their crosses and given proper burial rites. What followed, however, was an even more grim and calculated act than Hamilcar’s earlier crucifixions. Hannibal, still alive but in a state of extreme suffering, was brought to the site and subjected to brutal torments. In a chilling act of retribution, he was eventually nailed, still breathing, to the same cross that had once borne Spendius’ body. For the rebels, it is reasonable to assume that Hannibal served as a symbolic stand-in for Hamilcar—whom they undoubtedly wished to capture or punish in his place. After Hannibal’s death, Mathos conducted a ritualized scene of retribution. The body of Spendius was laid out with care, perhaps in imitation of traditional funerary rites, and the thirty Carthaginian captives—taken in the earlier assault—were placed around him. One by one, they were executed, transforming the event into a grim spectacle of justice in the eyes of the rebels.
Hamilcar’s original tactical arrangements for the blockade—dividing his forces between two camps—had unintentionally aided the enemy by preventing rapid mutual support between the divisions in the event of a sudden attack. Polybius suggests that Hamilcar did attempt to come to Hannibal’s aid, but the effort was too late. As he records, “Barca was late in learning of the attack from the town, due to the distance between the camps; when he did learn, he could not rush aid forward because of the difficult terrain between them.” With Hannibal’s troops either killed or routed, Hamilcar’s own position—situated between the salt-marsh and the sea—became strategically unsustainable. Mathos’ forces, now bolstered by captured supplies and arms from Hannibal’s camp, outnumbered Hamilcar’s and posed a renewed threat. It was unlikely that they would simply retreat back into Tunis to resume a passive defense. Despite their significant victory, remaining in Tunis would be a dead-end for the rebels. They could neither prevent reinforcements from reaching Hamilcar nor afford to risk an attack on Carthage. However, their triumph and the new resources it provided gave them one final opportunity—to break out from their confinement and attempt to reignite the war elsewhere.
Hamilcar’s Strategic Withdrawal
Rather than retreat into his camp and face the superior numbers of Mathos’ forces, Hamilcar made the strategic decision to retreat. He broke camp and maneuvered around the salt marsh and hills, heading toward the mouth of the Bagradas River. At this point, it was clear that engaging Mathos in direct combat would be unwise, especially without first rallying the remnants of Hannibal’s division and, ideally, receiving reinforcements from Carthage. Attempting to re-establish a blockade of Tunis from the north was also deemed impractical. Even if additional troops could be called up from Carthage, it would have been risky to try and reassert control over the area without a more solidified force.
The journey from Hamilcar’s camp to the mouth of the Bagradas River spanned approximately 35 kilometers. The army would have spent a full day of hard marching to cover this distance, or at the very least, the 26 kilometers to reach the bridge near La Sebbala. Despite being only about 15 kilometers away from the same bridge, the rebels did not engage Hamilcar as he advanced toward it. Though they outnumbered him, Hamilcar’s forces included elephants and the cavalry of Naravas, which likely deterred any attempt at an attack. If any of Mathos’ officers had advised a more aggressive response, their proposals were evidently dismissed—and, if necessary, suppressed by the customary disciplinary measures. By failing to act, the rebels squandered their final opportunity to seize back the strategic initiative. Once in position near the river, Hamilcar successfully re-established contact with Carthage.
The Road to Leptis Parva
Mathos was left with two realistic options: to launch an attack against Hamilcar’s battle-hardened forces or to retreat. Ultimately, he judged that holding Tunis was no longer viable and instead led his army southward, covering a distance of roughly 160 kilometres to the affluent port city of Leptis Parva. Situated in the fertile region of Byzacium, Leptis Parva offered both strategic depth and access to resources. In hindsight, Mathos’ decision not to confront Hamilcar near the Bagradas may be viewed as a missed opportunity. With an estimated 20,000 men still under his command—many of whom were rearmed with equipment captured from Hannibal’s camp—he outnumbered Hamilcar’s force of 10,000 to 12,000. A determined assault, despite the risks, might have broken through Carthaginian lines and shifted the momentum. Instead, Mathos chose to abandon Tunis altogether and turn toward the countryside in the opposite direction, effectively ceding the strategic initiative to Hamilcar. Although Mathos escaped from Tunis, his luck soon ran out, and by late 238 BC, he was forced to face the full might of the Carthaginian army in the final battle at Leptis Parva.
© 2026 History and War
Author: Jishu Roy
Unauthorized reproduction of this content is prohibited.